How to Create a Titleless Notes Page
This guide walks through creating a social media style Notes feed in Pure Blog — short, titleless posts displayed as cards on a dedicated /notes page.
You will create six things:
- A
notespost layout so individual notes render without a title. - A
/content/includes/notes.phptemplate that renders all notes as a social-style feed. - A custom route and nav item to wire up
/notes. - An
on_filter_posthook that auto-fills the title with the current timestamp. - A
content/includes/post-list.phpoverride that hides notes from the main post list. - A
/notes/feedRSS feed for notes.
Pure Blog's admin always requires a title field — it is used for validation, slug generation, and the HTML <title> tag in the browser. Your notes will have a title behind the scenes; it just won't be displayed on the page. Step 4 below shows how to auto-generate this title from the current timestamp so you never have to fill it in manually.
Step 1: Create the Notes Layout
A custom layout is a PHP file in content/layouts/ that allows you to create posts in a format that's different from Pure Blog's default offering. When created, you will be prompted for which post type you want to create when you tap the NEW POST button in admin. An optional .json file alongside it gives it a friendly name in the editor.
content/layouts/notes.php
This file controls how an individual note is rendered when someone visits its permalink. It omits the <h1> title entirely and just renders the post content.
<article class="note-single">
    <?= render_markdown($post['content'], ['post_title' => '']) ?>

    <?php if ($post['date']): ?>
        <p class="note-date">
            <time datetime="<?= e(format_datetime_for_display((string) $post['date'], $config, 'c')) ?>"><?= e(format_post_date_for_display((string) $post['date'], $config)) ?></time>
        </p>
    <?php endif; ?>
</article>
content/layouts/notes.json
This gives the layout a readable label in the post editor dropdown, so when you hit the NEW POST button it says "Note".
{
    "label": "Note"
}
Step 2: Create the Notes page
Pure Blog custom routes must point to PHP files inside content/includes/, so you must create the Notes template there - content/includes/notes.php
This template fetches all published posts that use the notes layout and renders them as cards.
<?php

$pageTitle   = 'Notes';
$metaDescription = 'Short notes and thoughts.';

$notes = array_values(array_filter(
    get_all_posts(false),
    fn(array $post): bool => ($post['layout'] ?? '') === 'notes'
));
?>
<?php require PUREBLOG_BASE_PATH . '/includes/header.php'; ?>
<?php render_masthead_layout($config, []); ?>

<main>
    <h1>Notes</h1>

    <?php if (empty($notes)): ?>
        <p>No notes yet.</p>
    <?php else: ?>
        <div class="notes-feed">
            <?php foreach ($notes as $note): ?>
                <article class="note-card">
                    <div class="note-card-body">
                        <?= render_markdown($note['content'], ['post_title' => '']) ?>
                    </div>
                    <footer class="note-card-footer">
                         <p class="note-timestamp">
                            <a href="<?= e(base_path() . '/' . $note['slug']) ?>">
                            <time datetime="<?= e(format_datetime_for_display((string) ($note['date'] ?? ''), $config, 'c')) ?>"><?= e(format_post_date_for_display((string) ($note['date'] ?? ''), $config)) ?></time>
                            </a>
                        </p>
                    </footer>
                </article>
            <?php endforeach; ?>
        </div>
    <?php endif; ?>
</main>

<?php render_footer_layout($config, []); ?>
</body>
</html>
The timestamp doubles as a permalink to the individual note, so readers can link to a specific note.
Optional: Add some CSS
Drop this into content/css/custom.css to get a basic look for your notes:
.notes-feed {
    display: flex;
    flex-direction: column;
    gap: 1.25rem;
    max-width: 640px;
}

.note-card {
    background: var(--accent-bg-color);
    border: 1px solid var(--border-color);
    border-radius: 6px;
    padding: 1rem 1.25rem 0.75rem;
}

.note-card-body p:first-child {
    margin-top: 0;
}

.note-card-body p:last-child {
    margin-bottom: 0.5rem;
}

.note-card-footer {
    border-top: 1px solid var(--border-light);
    padding-top: 0.5rem;
    margin-top: 0.75rem;
    font-size: 0.85em;
    opacity: 0.7;
}

p.note-timestamp {
  margin: 0.5rem 0 -1.5rem 0;
}

p.note-timestamp > a {
    color: var(--text-color);
    text-decoration: none;
}
Step 3: Add a custom route and nav item
Both settings live in Admin → Settings.
Custom Routes
In the Custom Routes field, add:
/notes | /content/includes/notes.phpThe path on the left is the URL; the target on the right is the path to the notes.php page we made earlier.
Custom Nav
If you want the Notes page to display in your site's navigation menu, you will need to add a custom nav item. In the Custom Nav field within Admin → Settings, add:
Notes | /notesThe format is Label | URL. This appends a Notes link to your site's navigation alongside any pages already shown there.
Save settings and you're done.
Step 4: Auto-fill the note title
Pure Blog fires an on_filter_post filter just before it validates the post on save. You can use this to auto-fill the title for notes so the user never has to type one.
Add the following to config/hooks.php:
function on_filter_post(array $post): array
{
    if (($post['layout'] ?? '') === 'notes' && trim($post['title'] ?? '') === '') {
        $config = load_config();
        $post['title'] = 'Note – ' . current_site_datetime_for_storage($config);
    }
    return $post;
}
If you want to have your notes publish automatically when you save them, add this to your hook after the $post['title']... line:
$post['status'] = 'published';current_site_datetime_for_storage() returns the current time in the site's configured timezone, formatted as Y-m-d H:i — for example, Note – 2026-04-13 15:30. That becomes the browser tab title and is used to generate the slug. It won't appear anywhere on the published page.
Setting status to published means notes are published immediately on save when the title is left blank. If you manually fill in a title, normal draft/publish behaviour applies.
Step 5: Hide notes from the main post list
Since v2.4.1, Pure Blog checks for a content/includes/post-list.php file before falling back to the built-in template. Creating your own gives you full control over what appears on the home page.
The key is to re-filter from $allPosts (available in scope) and recalculate pagination before rendering — otherwise page counts will be off if you have a lot of notes.
content/includes/post-list.php
<?php
// Exclude notes from the main list and recalculate pagination.
$filteredPosts = array_values(array_filter(
    $allPosts,
    fn(array $post): bool => ($post['layout'] ?? '') !== 'notes'
));
$perPage     = (int) ($config['posts_per_page'] ?? 20);
$pagination  = paginate_posts($filteredPosts, $perPage, $currentPage);
$posts       = $pagination['posts'];
$totalPages  = $pagination['totalPages'];
$currentPage = $pagination['currentPage'];

$paginationQueryParams = (isset($paginationQueryParams) && is_array($paginationQueryParams))
    ? $paginationQueryParams : [];
?>
<?php if (!$posts): ?>
    <p><?= e(t('frontend.no_posts')) ?></p>
<?php else: ?>
    <?php foreach ($posts as $post): ?>
        <article class="post-item">
            <!-- Archive view -->
            <?php if ($postListLayout === 'archive'): ?>
                <p class="post-archive-view">
                    <time datetime="<?= e(format_datetime_for_display((string) ($post['date'] ?? ''), $config ?? [], 'c')) ?>"><?= e(format_post_date_for_display((string) ($post['date'] ?? ''), $config ?? [])) ?></time>
                    <span class="post-archive-title"><a href="<?= base_path() ?>/<?= e($post['slug']) ?>"><?= e($post['title']) ?></a></span>
                </p>

            <!-- Excerpt view -->
            <?php elseif ($postListLayout === 'excerpt'): ?>
                <div class="excerpt-view">
                    <h2><a href="<?= base_path() ?>/<?= e($post['slug']) ?>"><?= e($post['title']) ?></a></h2>
                    <?php if ($post['date']): ?>
                        <p><svg class="icon" aria-hidden="true"><use href="#icon-calendar"></use></svg> <time datetime="<?= e(format_datetime_for_display((string) $post['date'], $config ?? [], 'c')) ?>"><?= e(format_post_date_for_display((string) $post['date'], $config ?? [])) ?></time></p>
                    <?php endif; ?>
                    <?php
                    $excerptSource = trim((string) ($post['description'] ?? ''));
                    if ($excerptSource === '') {
                        $excerptSource = get_excerpt($post['content']);
                    }
                    ?>
                    <p class="post-excerpt"><?= e($excerptSource) ?></p>
                    <?php if (!empty($post['tags'])): ?>
                        <p class="tag-list"><svg class="icon" aria-hidden="true"><use href="#icon-tag"></use></svg> <?= render_tag_links($post['tags']) ?></p>
                    <?php endif; ?>
                </div>

            <!-- Full post view -->
            <?php elseif ($postListLayout === 'full'): ?>
                <div class="full-post-view">
                    <h1><a href="<?= base_path() ?>/<?= e($post['slug']) ?>"><?= e($post['title']) ?></a></h1>
                    <?php if ($post['date']): ?>
                        <p class="post-date"><svg class="icon" aria-hidden="true"><use href="#icon-calendar"></use></svg> <time datetime="<?= e(format_datetime_for_display((string) $post['date'], $config ?? [], 'c')) ?>"><?= e(format_post_date_for_display((string) $post['date'], $config ?? [])) ?></time></p>
                    <?php endif; ?>
                    <?= render_markdown($post['content'], ['post_title' => (string) ($post['title'] ?? '')]) ?>
                    <?php if (!empty($post['tags'])): ?>
                        <p class="tag-list"><svg class="icon" aria-hidden="true"><use href="#icon-tag"></use></svg> <?= render_tag_links($post['tags']) ?></p>
                    <?php endif; ?>
                    <hr>
                </div>
            <?php endif; ?>
        </article>
    <?php endforeach; ?>
    <?php if ($totalPages > 1): ?>
        <nav class="pagination">
            <?php if ($currentPage > 1): ?>
                <?php
                $prevParams = array_merge($paginationQueryParams, ['page' => (string) ($currentPage - 1)]);
                $prevHref = e($paginationBase) . '?' . e(http_build_query($prevParams));
                ?>
                <a href="<?= $prevHref ?>"><?= e(t('frontend.pagination_newer')) ?></a>
            <?php endif; ?>
            <?php if ($currentPage < $totalPages): ?>
                <?php
                $nextParams = array_merge($paginationQueryParams, ['page' => (string) ($currentPage + 1)]);
                $nextHref = e($paginationBase) . '?' . e(http_build_query($nextParams));
                ?>
                <a href="<?= $nextHref ?>"><?= e(t('frontend.pagination_older')) ?></a>
            <?php endif; ?>
        </nav>
    <?php endif; ?>
<?php endif; ?>
No changes to settings are needed — Pure Blog picks up content/includes/post-list.php automatically.
Step 6: Add a notes RSS feed
Create content/includes/notes-feed.php. This outputs an RSS feed of your 20 most recent notes, modelled on Pure Blog's built-in feed.php.
content/includes/notes-feed.php
<?php
$notes = array_slice(
    array_values(array_filter(
        get_all_posts(false),
        fn(array $post): bool => ($post['layout'] ?? '') === 'notes'
    )),
    0, 20
);

$baseUrl = trim($config['base_url'] ?? '');
if ($baseUrl === '') {
    $baseUrl = get_base_url();
}
$baseUrl   = rtrim($baseUrl, '/');
$siteTitle = $config['site_title'] ?? 'My Blog';

$newestTimestamp = 0;
foreach ($notes as $note) {
    $ts = strtotime((string) ($note['date'] ?? '')) ?: 0;
    if ($ts > $newestTimestamp) {
        $newestTimestamp = $ts;
    }
}
if ($newestTimestamp === 0) {
    $newestTimestamp = time();
}

header('Content-Type: application/rss+xml; charset=UTF-8');

echo '<?xml version="1.0" encoding="UTF-8"?>';
?>
<rss version="2.0"
    xmlns:content="http://purl.org/rss/1.0/modules/content/"
    xmlns:atom="http://www.w3.org/2005/Atom">
    <channel>
        <title><?= e($siteTitle) ?> – Notes</title>
        <link><?= e($baseUrl) ?>/notes</link>
        <atom:link href="<?= e($baseUrl) ?>/notes/feed" rel="self" type="application/rss+xml"/>
        <description>Short notes and thoughts.</description>
        <language><?= e($config['language'] ?? 'en') ?></language>
        <?php foreach ($notes as $note): ?>
            <?php
            $noteUrl = $baseUrl . '/' . $note['slug'];
            $pubDate = format_post_date_for_rss((string) ($note['date'] ?? ''), $config);
            $content = render_markdown($note['content'], ['post_title' => '']);
            ?>
            <item>
                <title><?= e(format_post_date_for_display((string) ($note['date'] ?? ''), $config)) ?></title>
                <link><?= e($noteUrl) ?></link>
                <guid><?= e($noteUrl) ?></guid>
                <pubDate><?= e($pubDate) ?></pubDate>
                <description><![CDATA[<?= $content ?>]]></description>
            </item>
        <?php endforeach; ?>
    </channel>
</rss>
Note items use the formatted timestamp as their title, since notes don't have meaningful public titles.
Wire up the route
In Admin → Settings → Custom Routes, add a second line:
/notes | /content/includes/notes.php
/notes-feed | /content/includes/notes-feed.php
Your notes feed will be live at /notes-feed.
Writing a Note
- Go to Admin → NEW POST → NOTE.
- Write your note content in the body.
- Leave the Title field blank — if you added the
on_filter_posthook from Step 4, it will be filled in automatically with the current timestamp on save. You can still type a title manually if you want a specific slug or SEO label. - Publish.
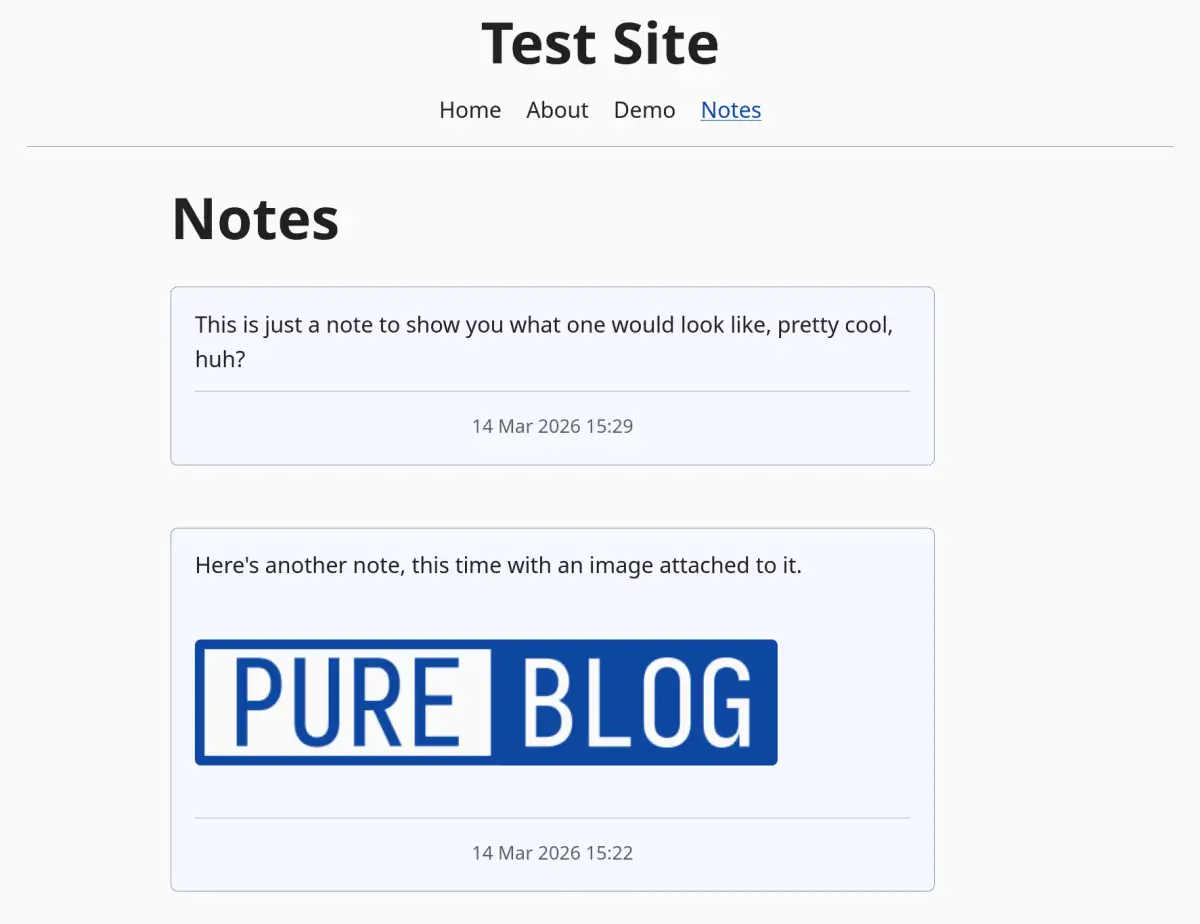
Once that's all created (around 5 minutes work in total) your notes page will look something like this:
You're done!
This process looks like a lot of work, but should take no longer than 5-10 minutes to implement, after which you will have your very own notes page that works independantly from the default Pure Blog posts.
There are a couple of others things you can do to your notes implementation, but these are totally optional.
Optional: Remove notes from the main RSS feed
Pure Blog's /feed is served directly by feed.php, so it bypasses the custom routes system. To filter notes out of it you need two things: a replacement feed file, and a .htaccess rule that intercepts /feed before Apache serves the real file.
content/includes/main-feed.php
This is feed.php with one change — the posts array filters out notes:
<?php

declare(strict_types=1);

require_once __DIR__ . '/../../functions.php';

require_setup_redirect();

$config = load_config();

$feedTtl = (int) ($config['cache']['rss_ttl'] ?? 3600);

$posts = array_slice(
    array_values(array_filter(
        get_all_posts(false),
        fn(array $post): bool => ($post['layout'] ?? '') !== 'notes'
    )),
    0, 10
);

$baseUrl = trim($config['base_url'] ?? '');
if ($baseUrl === '') {
    $baseUrl = get_base_url();
}
$siteTitle   = $config['site_title'] ?? 'My Blog';
$siteTagline = $config['site_tagline'] ?? '';
$baseUrl     = rtrim($baseUrl, '/');

$newestTimestamp = 0;
foreach ($posts as $post) {
    $ts = strtotime((string) ($post['date'] ?? '')) ?: 0;
    if ($ts > $newestTimestamp) {
        $newestTimestamp = $ts;
    }
}
if ($newestTimestamp === 0) {
    $newestTimestamp = time();
}

$etag         = '"' . md5((string) $newestTimestamp) . '"';
$lastModified = gmdate('D, d M Y H:i:s', $newestTimestamp) . ' GMT';

$ifNoneMatch = trim($_SERVER['HTTP_IF_NONE_MATCH'] ?? '');
$ifModSince  = trim($_SERVER['HTTP_IF_MODIFIED_SINCE'] ?? '');
$clientFresh = ($ifNoneMatch !== '' && $ifNoneMatch === $etag) ||
               ($ifModSince  !== '' && (strtotime($ifModSince) ?: 0) >= $newestTimestamp);
if ($clientFresh) {
    http_response_code(304);
    exit;
}

header('Content-Type: application/rss+xml; charset=UTF-8');
header('Cache-Control: public, max-age=' . $feedTtl);
header('Last-Modified: ' . $lastModified);
header('Expires: ' . gmdate('D, d M Y H:i:s', time() + $feedTtl) . ' GMT');
header('ETag: ' . $etag);

echo '<?xml version="1.0" encoding="UTF-8"?>';
?>
<rss version="2.0"
    xmlns:content="http://purl.org/rss/1.0/modules/content/"
    xmlns:atom="http://www.w3.org/2005/Atom">
    <channel>
        <title><?= e($siteTitle) ?></title>
        <link><?= e($baseUrl) ?></link>
        <atom:link href="<?= e($baseUrl) ?>/feed" rel="self" type="application/rss+xml"/>
        <description><?= e($siteTagline !== '' ? $siteTagline : $siteTitle) ?></description>
        <language><?= e($config['language'] ?? 'en') ?></language>
        <?php foreach ($posts as $post): ?>
            <?php
            $postUrl = $baseUrl . '/' . $post['slug'];
            $pubDate = format_post_date_for_rss((string) ($post['date'] ?? ''), $config);
            $content = render_markdown($post['content'], ['post_title' => (string) ($post['title'] ?? '')]);
            ?>
            <item>
                <title><?= e($post['title']) ?></title>
                <link><?= e($postUrl) ?></link>
                <guid><?= e($postUrl) ?></guid>
                <pubDate><?= e($pubDate) ?></pubDate>
                <description><![CDATA[<?= $content ?>]]></description>
            </item>
        <?php endforeach; ?>
    </channel>
</rss>
.htaccess
Add a rewrite rule for /feed before the direct-file-access rules, so it fires before Apache serves feed.php:
RewriteEngine On

# Redirect sitemap.xml to sitemap.php
RewriteRule ^sitemap\.xml$ sitemap.php [L,QSA]

# Custom feed — excludes notes layout posts
RewriteRule ^feed/?$ content/includes/main-feed.php [L,NC,QSA]
RewriteRule ^feed\.php$ content/includes/main-feed.php [L,NC,QSA]

# Allow direct access to existing files and folders
RewriteCond %{REQUEST_FILENAME} -f [OR]
RewriteCond %{REQUEST_FILENAME} -d
RewriteRule ^ - [L]

# Everything else goes through the front controller
RewriteRule ^ index.php [L,QSA]
Optional: Cross-post notes to Mastodon
The on_post_published hook fires whenever a post is newly published — including notes auto-published by the on_filter_post hook. Add the following to config/hooks.php, filling in your Mastodon instance URL and access token:
define('MASTODON_INSTANCE', 'https://mastodon.social'); // change to your instance URL
define('MASTODON_TOKEN',    'your-access-token-here');

function on_post_published(string $slug): void
{
    $post = get_post_by_slug($slug);
    if (!$post || ($post['layout'] ?? '') !== 'notes') {
        return;
    }

    $config  = load_config();
    $baseUrl = rtrim($config['base_url'] ?? get_base_url(), '/');

    // Convert markdown to plain text, then trim to Mastodon's 500-char limit.
    $text      = strip_tags(render_markdown($post['content'], ['post_title' => '']));
    $permalink = $baseUrl . '/' . $post['slug'];
    $status    = trim($text);

    if (strlen($status) + strlen($permalink) + 2 > 500) {
        $status = substr($status, 0, 500 - strlen($permalink) - 5) . '…';
    }
    $status .= "\n\n" . $permalink;

    $ch = curl_init(MASTODON_INSTANCE . '/api/v1/statuses');
    curl_setopt_array($ch, [
        CURLOPT_POST           => true,
        CURLOPT_RETURNTRANSFER => true,
        CURLOPT_HTTPHEADER     => ['Authorization: Bearer ' . MASTODON_TOKEN],
        CURLOPT_POSTFIELDS     => ['status' => $status],
    ]);
    curl_exec($ch);
    curl_close($ch);
}
To get an access token, go to Preferences → Development → New application on your Mastodon instance, create an app with write:statuses scope, and copy the access token from there.